How to DIY Beaded Bracelets + Necklaces

DIY beaded bracelets are a no-brainer if you’re ready for a new craft project. Whether you’re a craft lover or simply looking for a rainy (or sunny!) day activity, making beaded or word bracelets and necklaces is fun, simple, and doesn’t require many supplies.
The best thing is, they’re a great addition to your jewelry collection and make great gifts. You could even sell them on sites like Etsy as a side business! The options are endless, from custom word bracelets with people’s names to necklaces with bright colors and beautiful, unique beads.
Next, we lead you through a step-by-step tutorial on making DIY stretchy beaded bracelets and necklaces.
What Do You Need to Make a DIY Beaded Bracelet?
Great news! You only need minimal supplies to start your DIY beaded bracelets and necklaces.
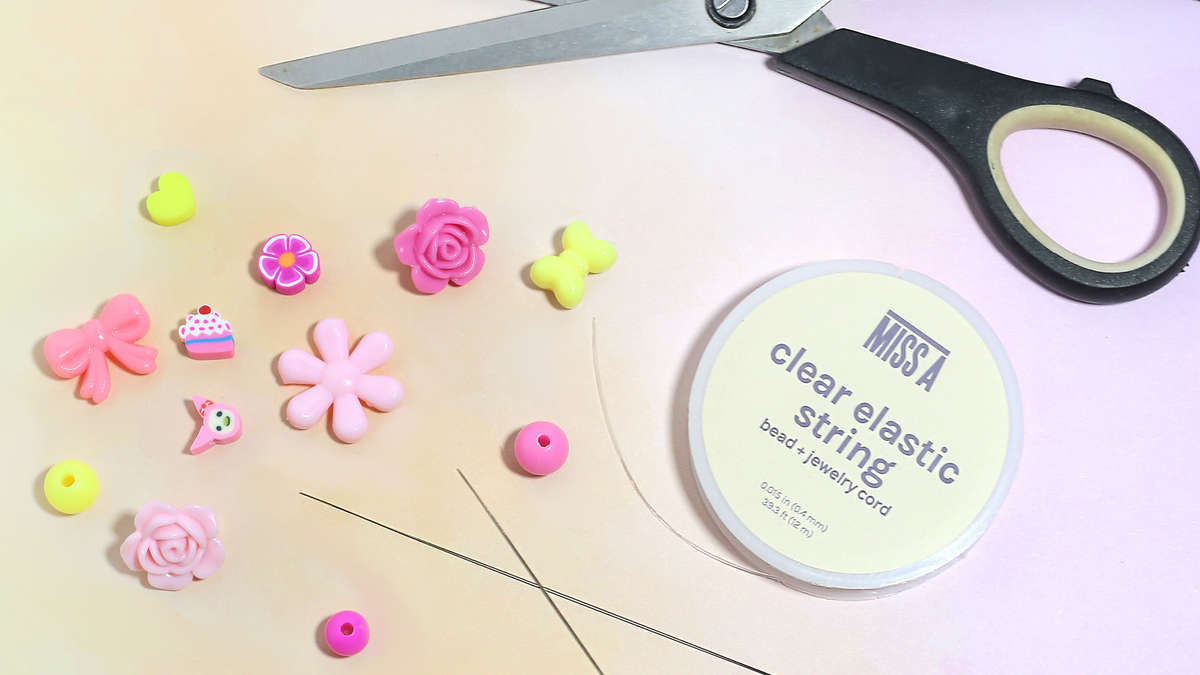
First, you want to get some elastic cord and a selection of different beads. Other things that can come in handy include a beading needle, jewelry glue, and a bead stopper to prevent your delicate beads from scratching against each other or moving around in your pattern.
You can check out our DIY bead kit, which has everything you need to get creative with a personalized beaded bracelet or necklace.
How to Make Beaded Bracelets and Necklaces
Follow these steps, and you'll have a personalized beaded bracelet or necklace in no time.
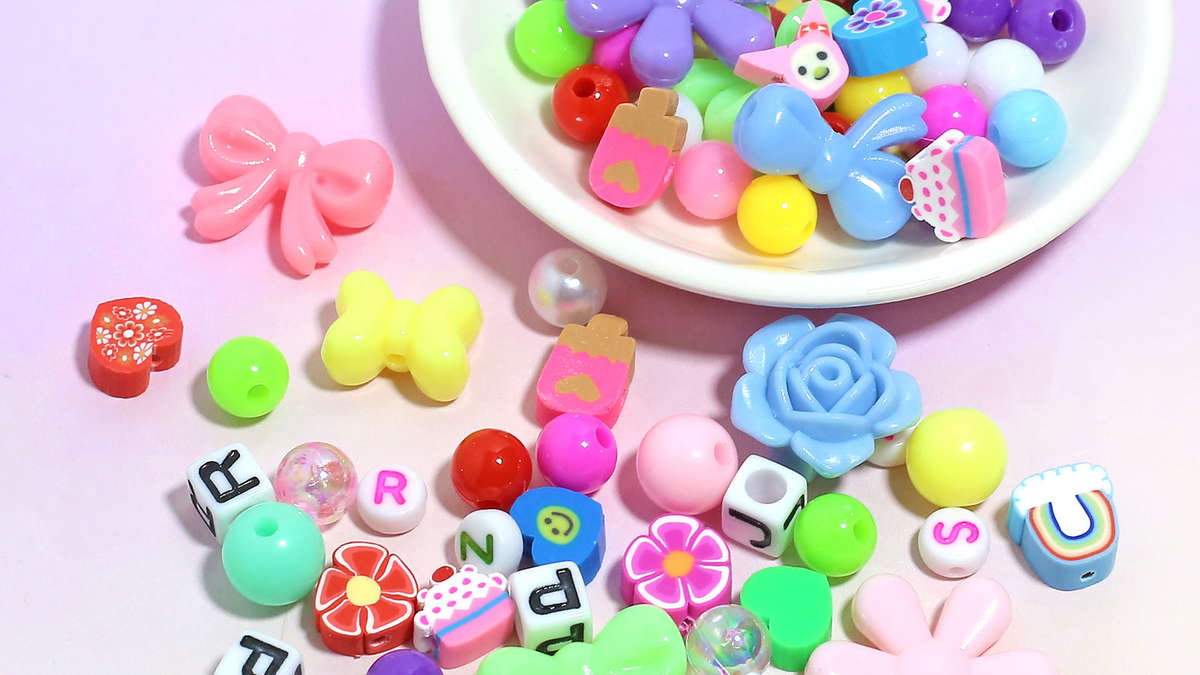
1. Choose Your Beads
Beads have the power to change how your bracelet or necklace looks and feels. You can decide whether you want something jazzy and bright, cool and understated, or ethereal and whimsical. Do you want a lot of tiny beads or mostly chunky ones? And, do you want to be able to add personalization such as names and dates?
Building up a bead collection can take a while, but over time, you will know more about what you like and don’t like to work with. If you're eager to begin, a starter kit is perfect for getting a headstart on your new hobby and teaching yourself the basics. Some of the most popular types of beads include:
Plastic beads: Plastic beads are often favored for bracelets and necklaces due to their versatility and color range. Typically inexpensive, they come in an array of sizes and different shades. You can also get ones that have letters or numbers, which are ideal for creating a personalized beaded bracelet or word bracelet.
Charms: Charms can feature various materials but tend to be made from metal or sterling silver.
Crystal beads: Crystal beads are made from glass and cut into different shapes and facets, giving them a crystal-like appearance. They're great for adding a bit of dazzle and sparkle to your beaded bracelet or necklace.
Wood beads: Wood beads are trendy and add a retro feel to your DIY word bracelets and necklaces. They’re lightweight and can come in various shades, shapes, and sizes.
Pearls: An opulent addition to any DIY bracelets, pearls are known for their iridescent sheen.
Polymer clay beads: Polymer clay beads come in various shapes, sizes, and patterns. They make an excellent choice for bracelets due to their versatility and can have a matte or glossy finish.
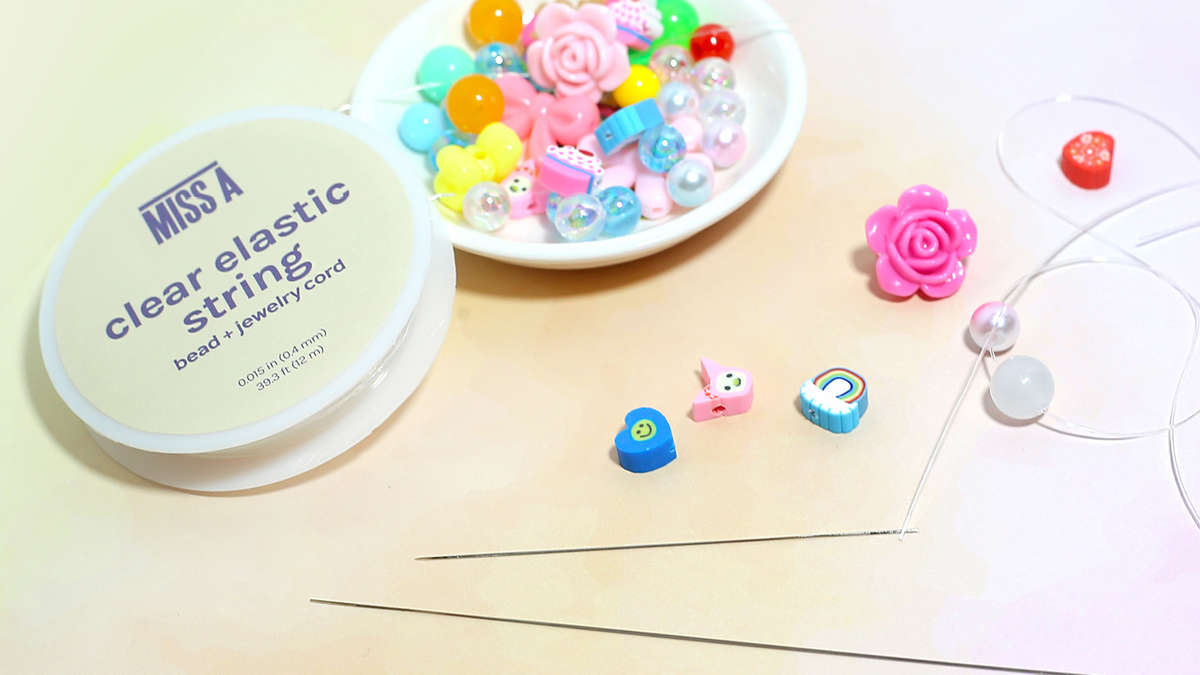
2. Pick Your Cord
Once you have the beads for your DIY beaded bracelet or necklace, you need to consider the cord you will use. The most common type of cord is made from a single strand of rubber and is inexpensive and easy to use. While rubber can be slightly harder to knot, it can be more secure if you tie it with a figure-8 knot [1].
Other cord types include stretch floss and polyester — all available in different thicknesses, lengths, and colors. Don't forget to consider your jewelry's final appearance when choosing the cord!
3. Gather the Materials
After choosing the beads and cord, gather everything into a secure container or tray. Selecting a tray with smaller segments can help ensure that your beads stay separated by type and don't roll off the table or surface.
4. Cut the Cord to the Correct Length
To make a bracelet, wrap the cord loosely around your wrist, and leave enough spare cord so that you can tie and fasten it. You also want to check that the cord won’t be too tight once you add beads, particularly if you want larger beads. If making the jewelry for someone else, remember that the average female wrist size [2] is 5.5 to 6.5 inches, while the median child wrist size is less than 5 inches.
5. Secure the Cord
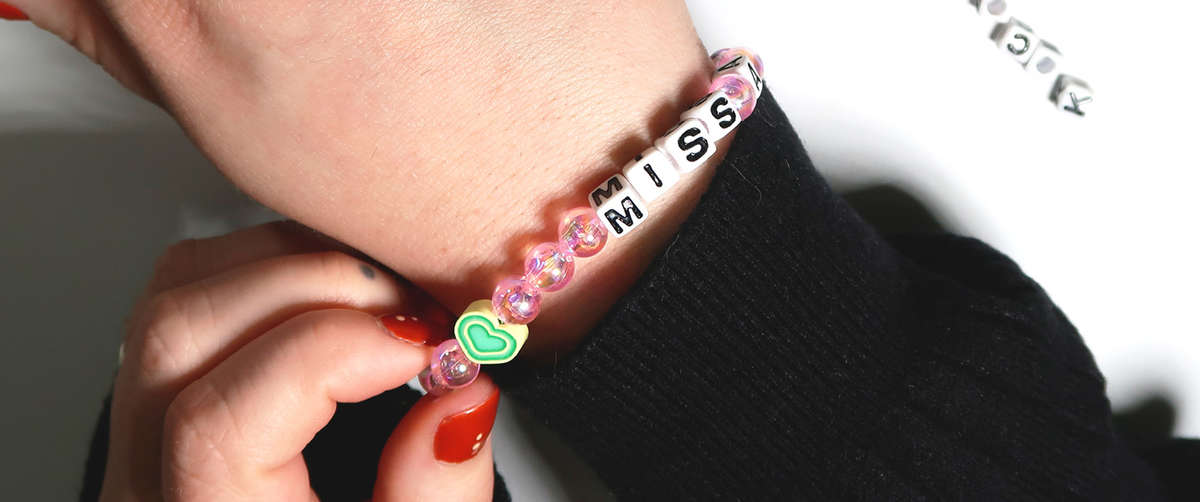
Once you’ve decided on the correct length, fasten your beaded or word bracelet so that your beads don’t fall off. Tie a knot in the end, and secure it with a bead stopper.
6. Thread the Beads
Some people prefer to lay their pattern on the table or a tray beforehand, while others like to make it up as they go along. No way is right or wrong; it’s down to personal preference and how organized you want to be!
When threading the beads, it's a good idea to use a beading needle to make the task easier. Made from metal, they look a bit like larger sewing needles but are thinner, have smaller eyes, and are more flexible. To use a beading needle, you push the thread through your needle and loop the end around or tie it. You can then slip your beads on in the correct order with ease.

7. Secure Your Bracelet
Once you finish threading the beads, you want to secure them. Tie a figure-8 knot, and then hide this knot with a bead to give your personalized beaded bracelet a finished look. It can be worth putting a small dab of glue on the end to keep the knot secure during daily wear. The last thing to do is trim the loose ends to make the jewelry as attractive and neat as possible.
Now you know how to make gorgeous DIY stretchy bracelets and necklaces. You can check out our bead-making kit and more on our website! (will add the DIY bead kit once the link is live)
Footnotes
[1] https://www.thesprucecrafts.com/how-to-tie-a-surgeons-knot-340201
[2] https://criticalbody.com/average-wrist-size/